Consuming a Service Deployed in TIBCO Cloud Mesh
This feature describes how to use TIBCO Cloud Mesh in an application in the TIBCO Cloud Integration Environment and TIBCO Business Studio client.
Authentication and authorization for these private endpoints is provided automatically. You browse available services and select one, rather than copying and pasting a URL. For more information on TIBCO Cloud Mesh, see the TIBCO Cloud Mesh topic in the TIBCO Subscriber Cloud documentation.
- Procedure
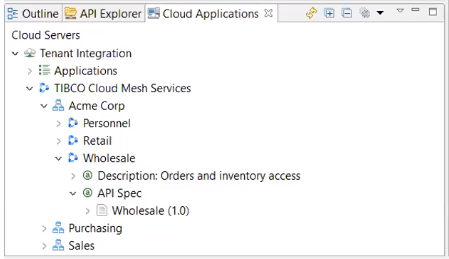
- Open the Cloud Applications view. (See note above if you have not yet connected to TIBCO Cloud™.)
- Under the Applications section, find the TIBCO Cloud Mesh Services section.
- Expand the section to view the services available to you. If your organization has related (parent or child) organizations, the screen displays all the related organizations as folders containing the services. Applications with Private endpoints (required to display the applications) are listed in the
TIBCO Cloud Mesh Services in the
Cloud Servers view.
- Right-click the mesh service and select
Import.

- In the Import API dialog, select Import to project.
- Click
Browse.

- Select a folder or project and click
OK.

- In the Import API screen, do
not click
Finish. Instead, click
Next.

- On the Change Swagger name screen, enter a logical, unique name for the Swagger file. The default pre-generated name tends to be too long and include random characters.
- Click
Finish.
The TIBCO Cloud Mesh service descriptor files (including the API files) are displayed in the Project Explorer section.

- Drag and drop the mesh service from the
Project Explorer to the application's
Process window and select
Create Reference from the resulting dropdown menu.
The service icon is added to the application project window.

HTTP Client Resource
All reference bindings that use TIBCO Cloud™ Mesh are preconfigured to use a single, special HTTP client resource, called TIBCOCloudMeshServices. This resource cannot be changed in the reference binding.
Select the TIBCOCloudMeshServices.httpClientResource in the Project Explorer tree.

The
Default Host field is automatically populated with the default value:
INTERCOM_HOST. This value is a constant and cannot be changed.
To verify and run the newly created client, either use Studio Debugger to debug the client application (the debugger securely connects to the service running in the cloud and returns the output), or push the client application to the cloud and scale it up.
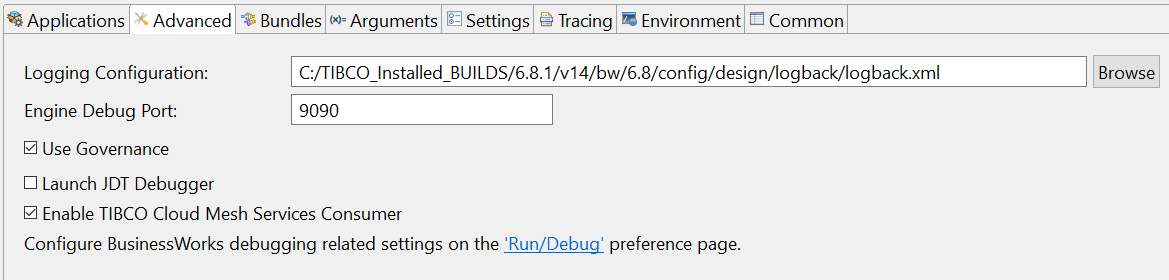
Single Sign On: After selecting the Enable TIBCO Cloud Mesh Services Consumer the checkbox, you can connect to the default cloud server mentioned in the ssoConfig.properties file.
REST Service Binding
When you create a REST service binding,
TIBCO Business Studio generates a default name
Resource and a default path
/resource for the service. When deployed to
TIBCO Cloud Integration, these names appear in the generated Swagger metadata for the endpoint. If left unchanged, all services deployed in this way appear indistinguishable in
TIBCO Cloud Mesh. Therefore, it is a good idea to immediately give any new service binding a more specific name and path.