Create Entry
Use the Create Entry activity to add entries to the connected LDAP server.
General
In the General tab, you can establish a connection to an LDAP server, and specify whether to validate the entry before creating it.
The following table lists the configurations in the General tab of the Create Entry activity:
| Field | Module Property? | Visual Diff? | Description |
|---|---|---|---|
| Name | No | Yes | The name to be displayed as the label for the activity in the process. |
| LDAP Connection | Yes | Yes | Click
 to select an LDAP Connection shared resource. The LDAP Connection shared resource creates a connection between the plug-in and an LDAP server. to select an LDAP Connection shared resource. The LDAP Connection shared resource creates a connection between the plug-in and an LDAP server.
If no matching LDAP Connection shared resources are found, click Create Shared Resource to create one. For more details, see Creating an LDAP Connection. |
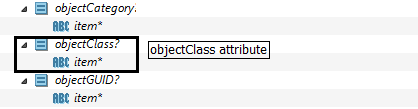
| Validate Object | Yes | Yes | When you select this option, the plug-in checks whether the configured object class matches the
objectClass attribute:
The configured object class refers to the object class that you select from the Advanced tab or the object class specified in the Input tab. The object class specified in the Input tab can overwrite the object class specified in the Advanced tab.
The objectClass attribute is one attribute of the specified object class.
|

Description
In the Description tab, you can enter a short description for the Create Entry activity.
Advanced
In the Advanced tab, you can specify the object class of the entry that you want to add. The specified object class is displayed in the Input tab.
The following table lists the configurations in the Advanced tab of the Create Entry activity:
| Field | Module Property? | Visual Diff? | Description |
|---|---|---|---|
| Base DN | Yes | Yes | Displays the distinguished name of the selected base entry.
Click Browse DIT to select a base entry from the Directory Information Tree (DIT). The Select Base DN dialog is displayed when clicking Browse DIT. In the Select Base DN dialog, move the slider to specify the maximum number of entries to be displayed in the DIT. The maximum number is 10000. |
| Select Object Classes From | No | Yes | Select a method to specify the object class of the entry that you want to add:
|
| Sample Entry | No | No | Click
Browse DIT to select a sample entry. The object class defined for the selected entry is automatically populated in the
Objectclasses field.
Note: This option is available only when you select
Sample Entry in the
Select Object Classes From field.
|
| LDAP Schema Classes | No | No | Click
Browse Schema to select one or more object classes. The selected object classes are automatically populated in the
Objectclasses field.
Note: This option is available only when you select LDAP Schema in the
Select Object Classes From field.
|
| Objectclasses | No | Yes | Displays the object classes of the entry that you want to add. |
| Handle Any Subset of Configured Object Classes | Yes | No | Select this option to create entries that match any subset of the specified object classes.
Note: This option is available only when you select a composite object class.
|
Input
In the Input tab, you can specify the entry that you want to add.
The following table lists the input elements in the Input tab of the Create Entry activity:
| Input Item | Data Type | Description |
|---|---|---|
| DN | String | (Required) Enter the distinguished name (DN) of the entry that you want to add. |
| ObjectClass | String | Enter the object class of the entry that you want to add. The entered object class replaces the object class that you have specified in the
Advanced tab.
Object classes are separated by periods (.), for example, " |
| Object Class | Complex | Expand the object class and enter a value for the corresponding attribute. |
Output
In the Output tab, you can find the creation result.
The following table lists the output elements in the Output tab of the Create Entry activity:
| Output Item | Data Type | Description |
|---|---|---|
| Result | Boolean | A value of true indicates the creation succeeds, whereas a value of false indicates the creation fails. |
Fault
In the Fault tab, you can find the error code and error message of the Create Entry activity. See Error Codes for a more detailed explanation of errors.
The following table lists error schema elements in the Fault tab of the Create Entry activity:
| Error Schema Element | Data Type | Description |
|---|---|---|
| msgCode | String | Displays the error code. |
| msg | String | Displays the error message. |