Create A Flow To Delete Tutorial Data From The Sample CRM Database
On Schedule App Tutorial
Integration Flows can be used to integrate data from one datastore to another while simultaneously transforming that data using formulas, such as merging fields, adding a suffix, modifying a data type, truncating a field, or removing whitespace. In this lesson we need to delete unwanted data from a datastore. Create an Integration Flow to filter Sample CRM lead records and remove the tutorial data added from the Sample Marketing files in the previous lessons.
Objectives
Learn how to:
- Create an Integration Flow
- Use the same connection for both Source and Target to do housekeeping
- Filter data
- Use Matching Criteria
- Debug the Integration Flow
Add A Flow
- Select Apps from the Menu bar.
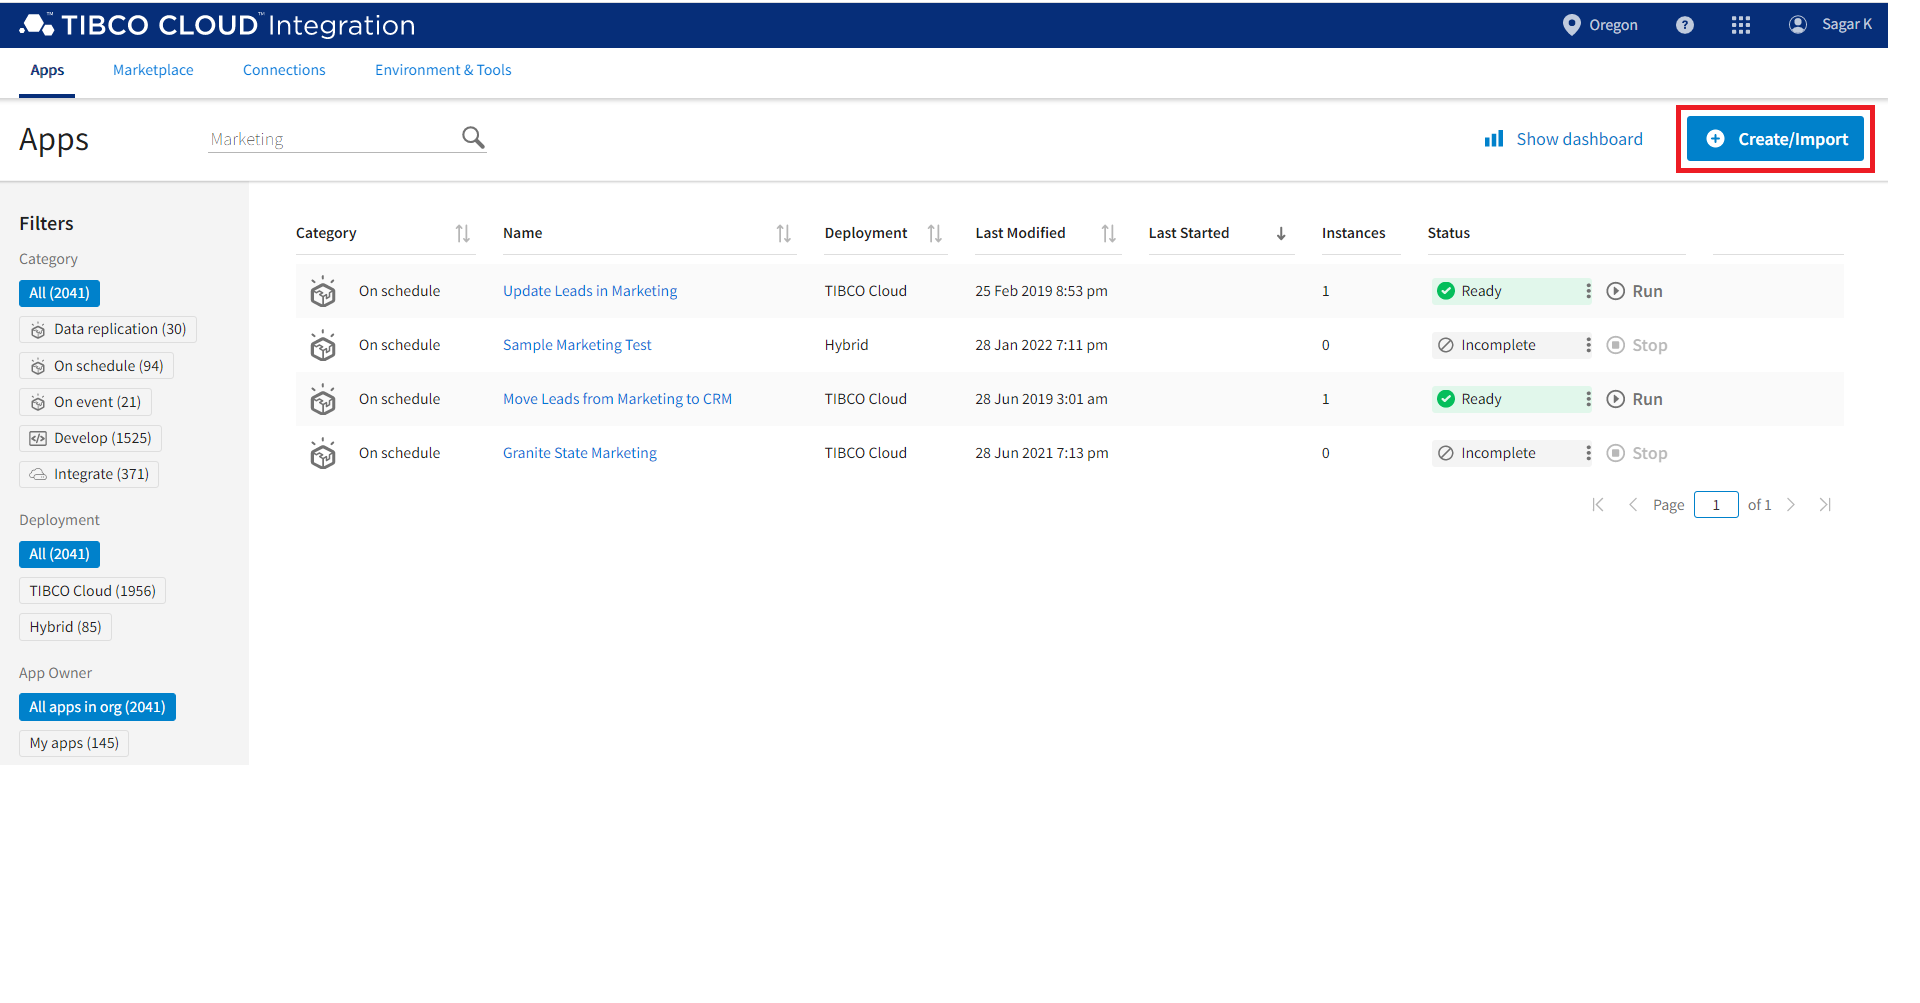
- On the Apps page, select Create/Import to start your new App.

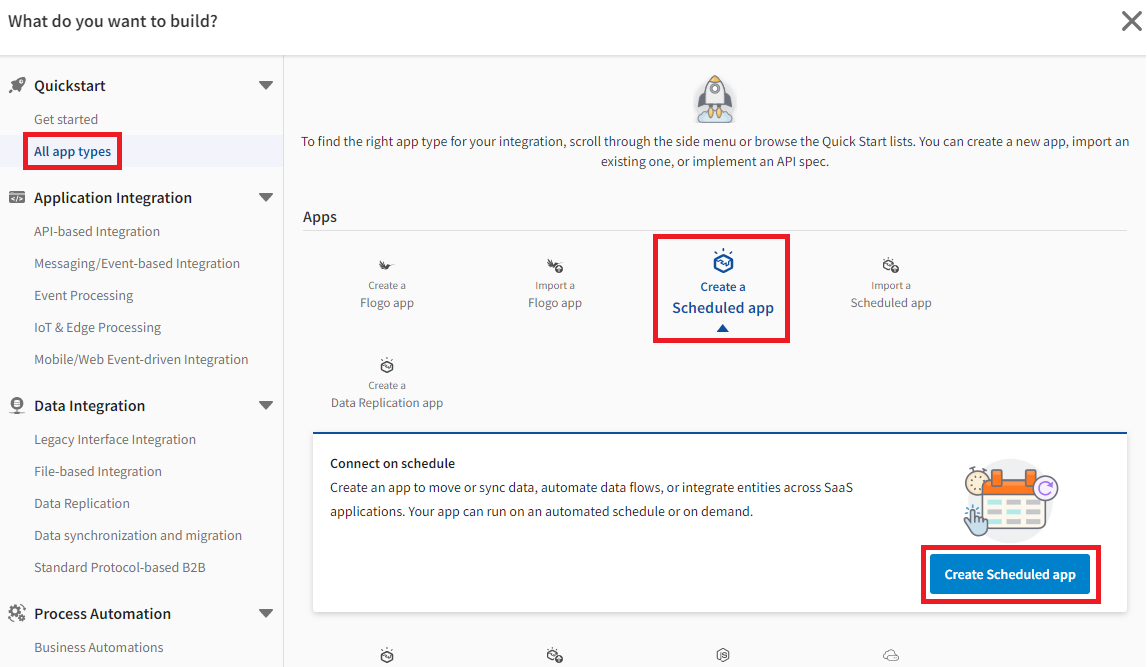
Apps Page — Create/Import App
-
Select All app types>Create a Scheduled app.

-
You can change the name of the app using the top left corner option. Select your TIBCO Cloud™ Integration - Connect Agent from the Agent drop-down.
Tip: The TIBCO Cloud™ Integration - Connect agent is named using the name of your computer. For example, if the name of your computer is Ferrari, then the name of your agent is Ferrari Agent. If you have more than one Agent installed, a number is appended to the name.
- Select New Flow>Integration Flow.

- You can rename the Flow using the top left corner option.

-
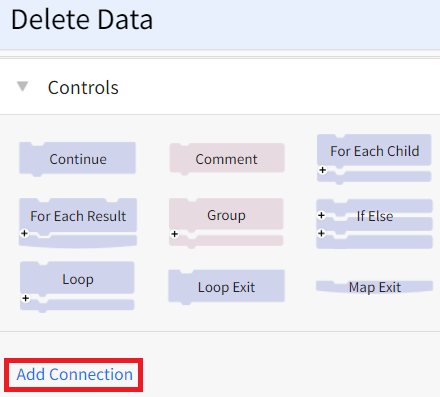
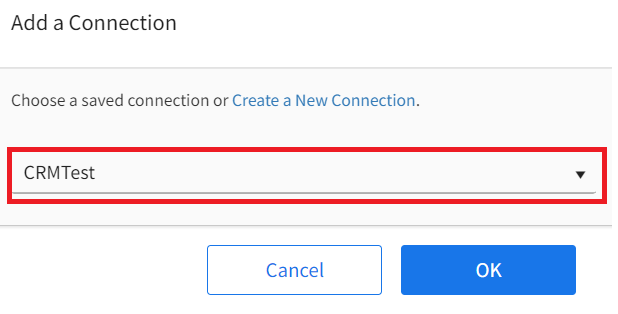
In the Connection panel on the left, select the Add Connection link.
- In the Add a Connection dialog, select the CRMTest Connection created in the lesson titled Configure A Sample CRM Connection from the drop-down and select OK to add the Connection to the Flow or click Create a New Connection to create a new one.

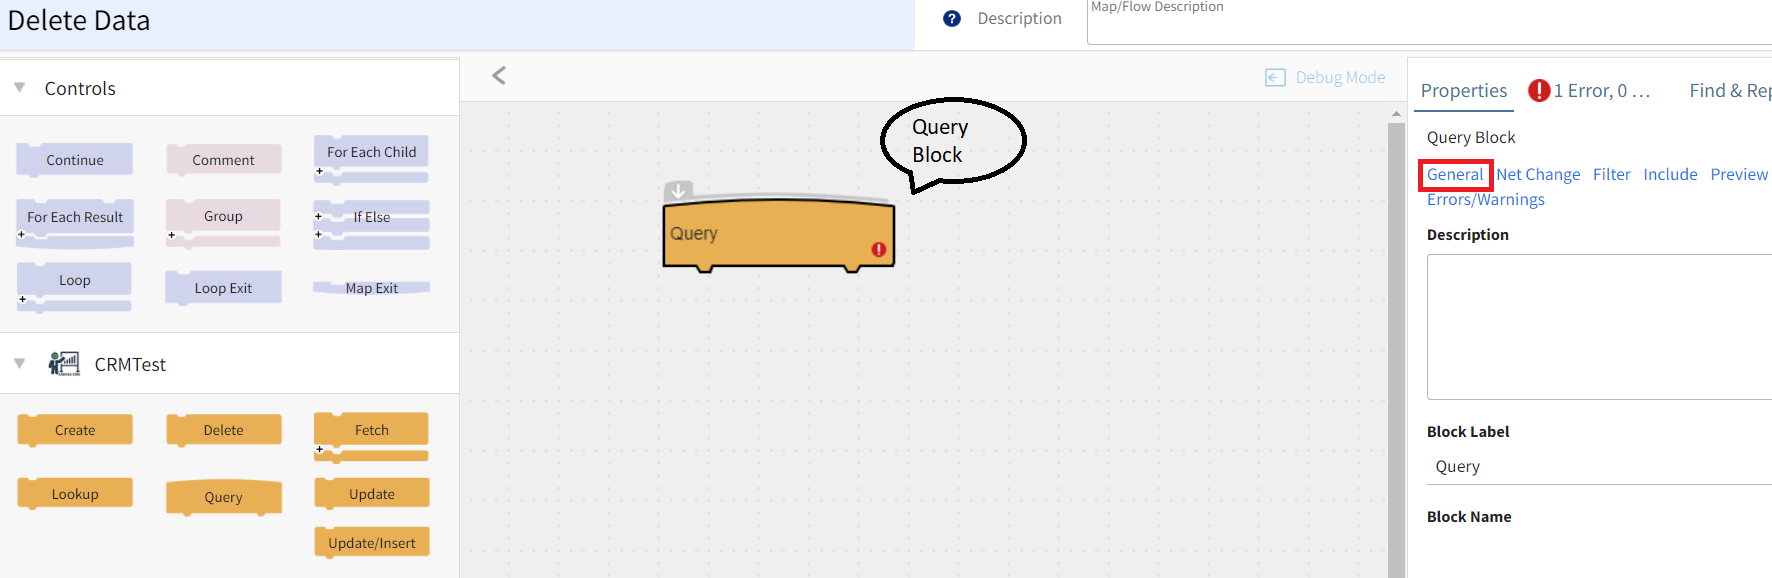
- Under the CRMTest Connection on the left, select the Query Block and drag it on to the Flow workspace.
- Select the General link on the Properties tab on the right side of the workspace. The Query Block Properties dialog displays with the General tab selected.
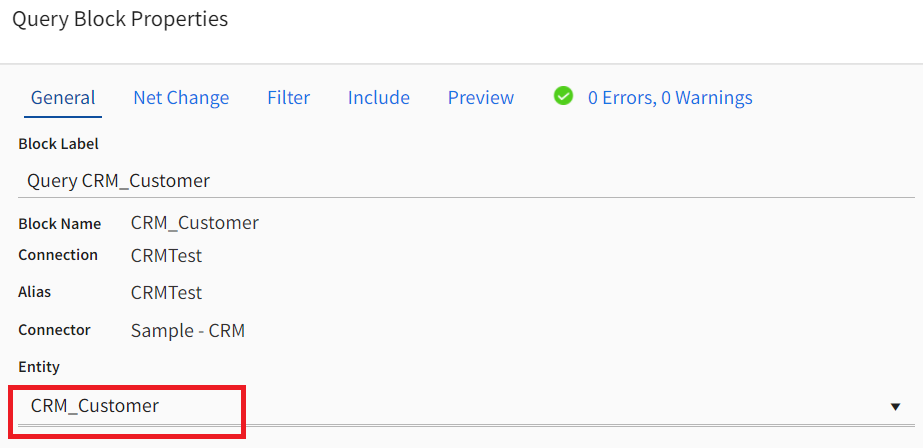
- In the Entity field, select CRM_Customer.
- Select the Filter tab and select the Add
 button.
 - In the Field drop-down select Category.
-
Make sure the Operator is set to equals.
- In the Value field type "Connect Tutorial", including the quotes.

Edit Query Block - Filter Tab
Note: Preview tab displays the first 25 records regardless of the filter. - Select OK to save your changes to the Query Block properties.
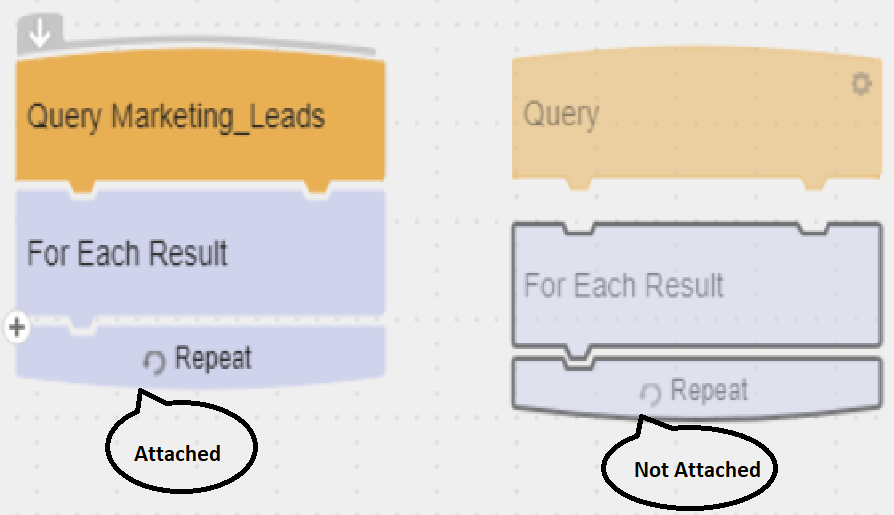
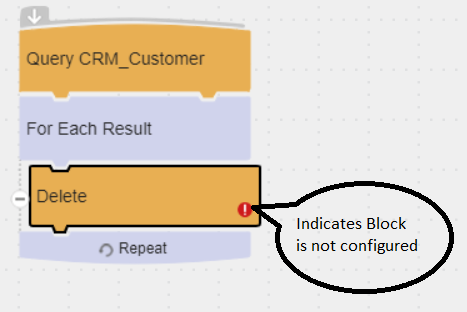
- Drag the For Each Result Block onto the Flow and put it under the Query Block. Make sure the Blocks are attached. If the For Each Result Block is transparent, as shown in the image below, it is not attached to the Query Block and the Flow cannot execute.

- Under the CRMTest Connection, select a Delete Block and drop it inside the For Each Result Block. The Delete block has a red icon on the corner because it has not been configured.

- Select the General link on the Properties tab to open the Block Properties dialog for the Delete Block.
- On the General tab, select CRM_Customer in the Entity drop-down.Note: The Batch Processing option is not applicable here as the source and target database are simple spreadsheets.
- Select the Matching Criteria tab. Matching Criteria is used to locate the specific record in the target data that matches the source record being processed. This ensures that the correct record in the target is updated or deleted.
- In the Field drop-down select Category. This is the Category field for the record in the target datastore.
- Make sure the Operator is set to equals.
- Select Value tab and Select the Formula icon
 Value field to open the Formula Editor.
 - In the Formula field type "Connect Tutorial", including the quotation marks. The Matching Criteria is used to make sure that the source record matches the target record before any action is taken on the target record.

Edit Delete Block - Matching Criteria
- Select OK to save the Delete block configuration.
- Select OK to save and close the Flow.


Debug A Flow
Use the Flow, Delete Data, created in the previous section, to learn about Debug. Debug goes through the Flow one Block at a time and displays the results of each step for a single record from the Query. If the Flow executes successfully, the record used for debug is modified in the target datastore.
- On the Apps page, open the Delete Tutorial App.
- In the Flows section, select the Delete Data Flow to open it.
- Select Debug Mode at the top of the workspace.
- Select Start to begin the Debug process. Debug goes through the Query Block, selects the first record that matches the criteria configured for Query, and displays the record information in the Inputs panel.
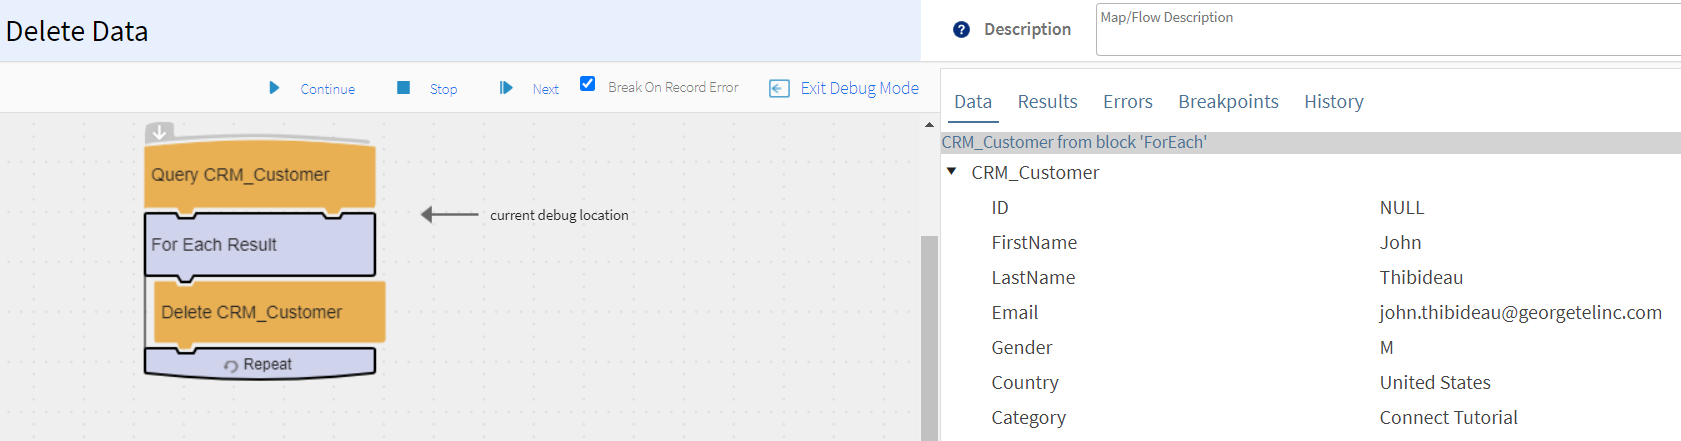
Debug Inputs For Query Block
- Select Next to move through the next Block in the Flow. Debug stops after the For Each Result Block and displays the lookup results used to fulfill the requirements of the Delete Block.
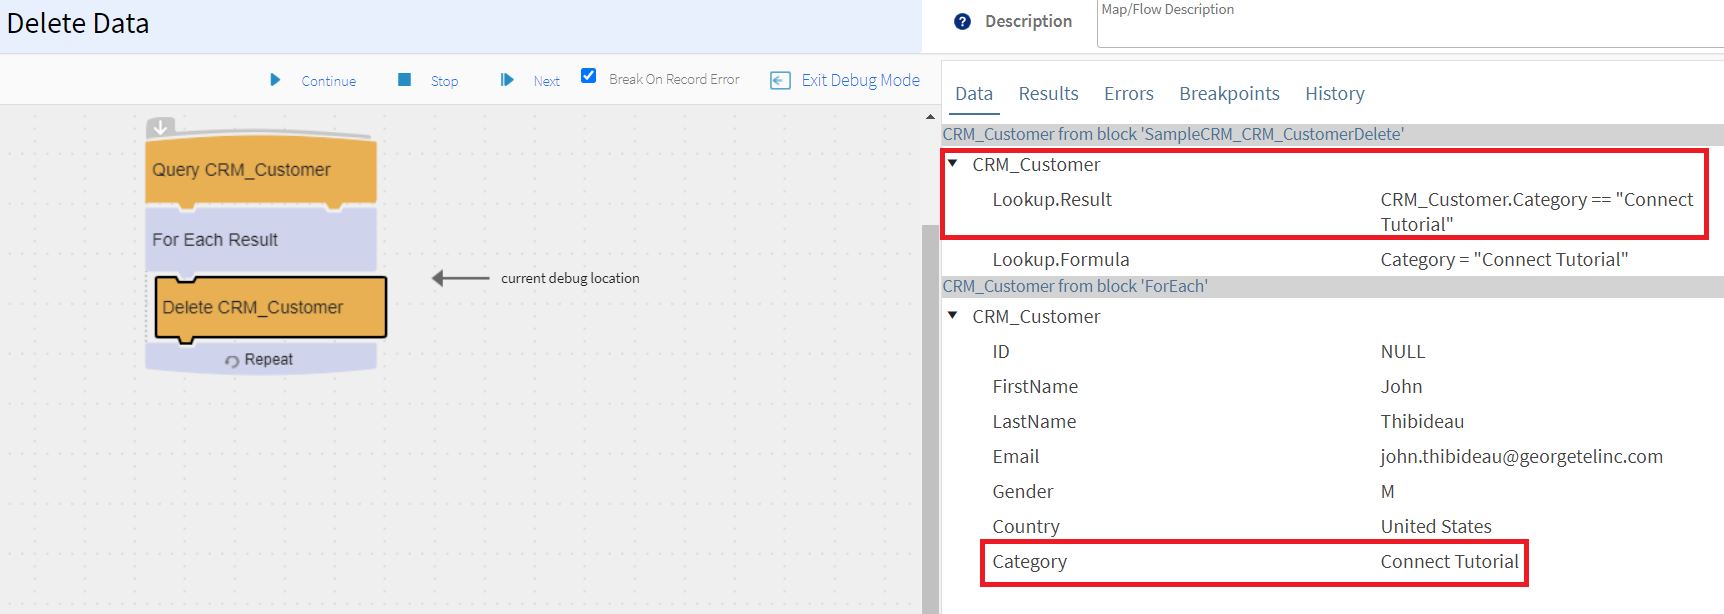
Debug Results For Delete Block Matching Criteria
- Click the Next button to move through the Delete block in the flow. Debug stops after the Delete block. Select the Results tab to display the record that was deleted in the results panel. Only fields used in the Flow are displayed. Fields associated with the deleted record, but not used in the Flow, are not displayed.
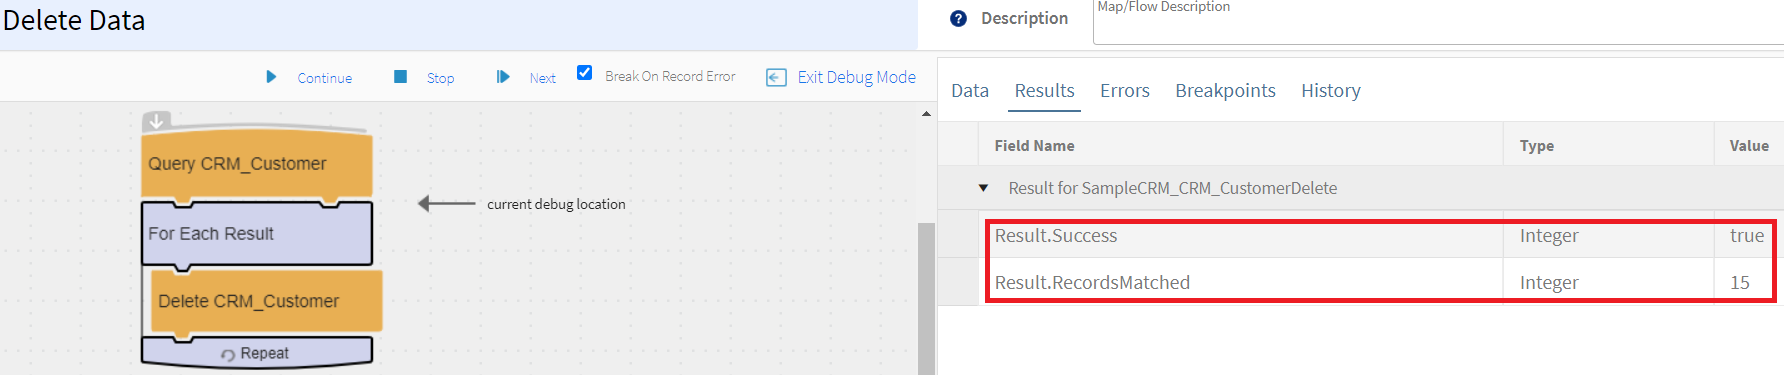
Debug Results — Deleted Record
- Select Stop to stop the Debug process.
- Select Exit Debug Mode to exit the Debug process.
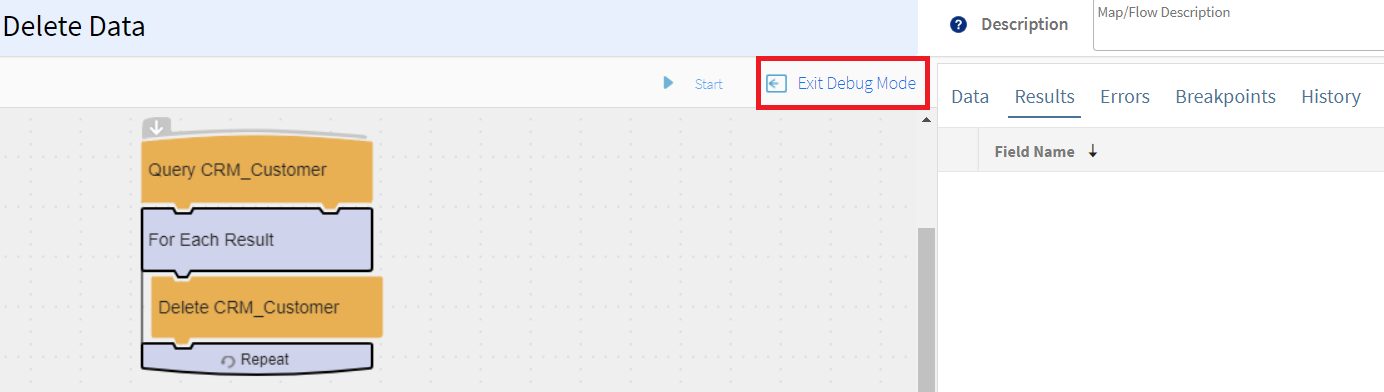
-
Select OK to close and save the Flow.
- Select the Run button at the top of the Delete Tutorial app. Any remaining Tutorial Leads records stored in Sample CRM are deleted as the Flow executes.
-
Select Execution History, to view the Execution History for your App. Each time you successfully ran Debug, you deleted one record. If you encountered errors during your Debug session, those errors display in the Execution History when you select the Info icon
 .
. 
Delete Tutorial Leads App — Execution History Detail


Return to On Schedule App Tutorial Overview to select the next lesson.