Updating An Agent
TIBCO occasionally releases a new version of the TIBCO Cloud™ Integration - Connect Agent to improve functionality or performance. When this occurs, the following message displays on the Agents page:
Agent is out of date
In this case, TIBCO Cloud™ Integration - Connect automatically updates the agent.
TIBCO Cloud™ Integration - Connect Agent Automatic Updates
The TIBCO Cloud™ Integration - Connect agent contacts the cloud every three hours to see if there is a newer agent available. If the agent determines that it is out-of-date, it automatically updates itself.
If your agent is too old to update automatically, the agent status is red and displays the following message: Obsolete, install new Agent. You can manually install an agent, update your apps to use that agent, and then delete the obsolete agent.
Reprovisioning The Connect Cloud Agent
You can, if required, delete and reprovision a Connect cloud agent as follows:
- If necessary, install a Connect on-premise agent. See Installing A TIBCO Cloud™ Integration - Connect On-Premise Agent.
- Edit each app that uses the Connect cloud agent to set it to a different agent temporarily. From the agent drop-down in the App Details page, select the Connect On-Premise agent. Changes are saved immediately.
- When all apps are using the Connect on-premise agent, you can delete the current Connect cloud agent and provision a new one. See Provisioning A TIBCO Cloud™ Integration - Connect Cloud Agent.
Updating The Connect On-Premise Agent Manually
You can, if required, force a Connect on-premise agent to update immediately. To do so, restart the agent Windows Service. When the agent restarts, it always checks for the latest version.
Reinstalling The Connect On-Premise Agent
In general, the Connect on-premise agent updates without any human intervention required. However, if you need to reinstall your agent for some reason, this section guides you through the steps.
Uninstall The Current Connect On-Premise Agent
- From the Microsoft Windows Control Panel select either Add or Remove Programs or Programs and Features depending on the version of your operating system.
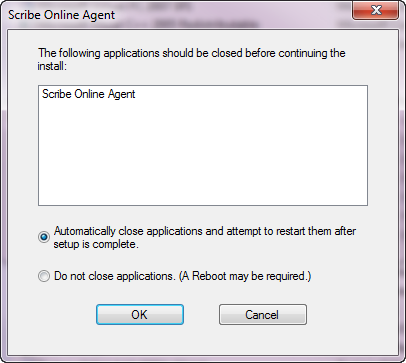
- Right-click the agent and select Uninstall. A message similar to the following may display:
- If you see this message, select Automatically close applications and then select OK.
- Follow the instructions to uninstall the agent from this computer and then close the Control Panel.
- If needed, restart TIBCO Cloud™ Integration - Connect. From the apps page, view whether the status of any apps that use this agent are something other than Running
 . Since there is currently no agent, this is expected. For more information about status, see Agents.
Download The Connect On-Premise Agent Software
- From the menu, select Environment & Tools.
- Under Environment Settings, select Agents to display the Agents page.
- Select New Agent > Connect On-Premise.
Run The Agent Installer
- On the Install Connect On-Premise Agent dialog, select Install Connect On-Premise Agent to download the agent installer.
- Select Copy to copy the Connect On-Premise Agent Key. The Agent Key is required in a later step. Note: If you have a problem with the Agent Key, you can move the installation Wizard page aside to copy it again.
- Locate the ScribeInstaller.exe file in your default downloads folder.
- Right-click the installer file and select Run to begin the installation. You may see one or more Security Warning messages. Select Run or Yes as needed to open the System Configuration Check page.
Check System Configuration
The System Configuration Check page displays, which verifies that all of the prerequisites have been met. Since this check was performed the first time you installed an agent, you can review and accept the license file, and select Next to open the TIBCO Cloud™ Integration - Connect Agent Setup wizard.
Install The TIBCO Cloud™ Integration - Connect Agent
- From the Welcome page, select Next.
- Paste in the Agent Key that you copied earlier, then select Next.Note: If necessary, move the Wizard window to copy the key.
- Decide where to install the Connect on-premise agent.
- To use the default location, select Next.
- To select a different location, select Change, browse to the new location, and select Next.
- Select Install Agent to install the Connect on-premise Agent, then select Finish.
- After you select Finish, the agent connects with the TIBCO Cloud™ Integration - Connect cloud, which may take a few minutes. When the connection is successful, the new agent displays on the Agents page.
After an agent is installed or provisioned, its status displays in the Agents page and the agent drop-down list in apps and Connections. Agents that are ready to use display with a green Running status
 .
.
Configure Apps To Use The New Agent
The next step is to make sure all apps are using the new agent. From the apps list, you need to edit each app that used the outdated agent. For each app:
- Select Apps from the menu.
- Select an app from the Apps page.
- In the Agent drop-down list, select the name of the new Agent. Changes are saved immediately.
Note: The Agent list displays all agents, whether or not they are valid. Make sure you select a valid agent.
Test Connections
Now that your apps are using the new agent, test all of the Connections that are using the agent. From the Connections page, for each Connection:
- Select Connections from the menu.
- Select a Connection to open it.
- Select the new agent from the Agent drop-down list.
Note: The Agent list displays all agents in this Organization. Some agents in the list may not be valid for the selected Connection.
- Select Test Connection.
- If the test is successful, select OK to save your changes and close this dialog.
Note: If the test is not successful, see Troubleshooting The TIBCO Cloud™ Integration - Connect Agent to help determine what went wrong, or contact TIBCO Support.
- Select an app from the apps page and select Run to ensure that your app can run with the new agent.
Remove The Old Agent
If desired, you can delete the oldagent from TIBCO Cloud™ Integration - Connect.
- From the menu, select Environment & Tools.
- Under Environment Settings, select Agents to display the Agents page.
- From the Agents page, hover over the agent you want to delete.
- Select the Delete
 icon. The Delete Confirmation dialog displays. Note: The Delete option is enabled only if there are no apps using this agent.
 - If you are sure you want to delete the agent, select Yes, delete. All references to that agent are deleted from TIBCO Cloud™ Integration - Connect.